Saturday evening we fought the first battle of the new
three-game campaign set in Austria 1809. Chris, Greg C. and I command the
Austrian forces while Greg R., Eric, John and Terry command the French and
Bavarian forces. I am acting as the Austrian commander in chief and Greg R. as
the French commander in chief.
In this first battle, I wished to act on the defensive –
being passive on the field – and allowing the French to attack us. I also
wished to spend morale points on some earthworks. After bleeding the French a
little, we’d go over onto the attack in the next battle. There were two
problems with my wish for the defensive however…
The first issue was that I was unaware of the topology of
the field. My fault, I left the map sheet at Brent’s. So, when I arrived to
survey the field, there was a central hill that would have dominated the
defensive position.
The second issue is that one of the Austrian commanders is
not keen on defense. He, Greg, really did not like the idea of being passive.
That’s cool, my command, unlike the real Austrian command, is not an
aristocracy…so, after much debate, I opted for a defensive posture that could
swing onto the attack given circumstances.
Unbeknown to us all, was a third factor that rendered an
Austrian defense undesirable. The French army was not rated very well for the fight
and their commanders had also opted for a defensive posture. One small French
command had not yet arrived at the field when hostilities began, and the
defensive-natured terrain was on their side of the field.
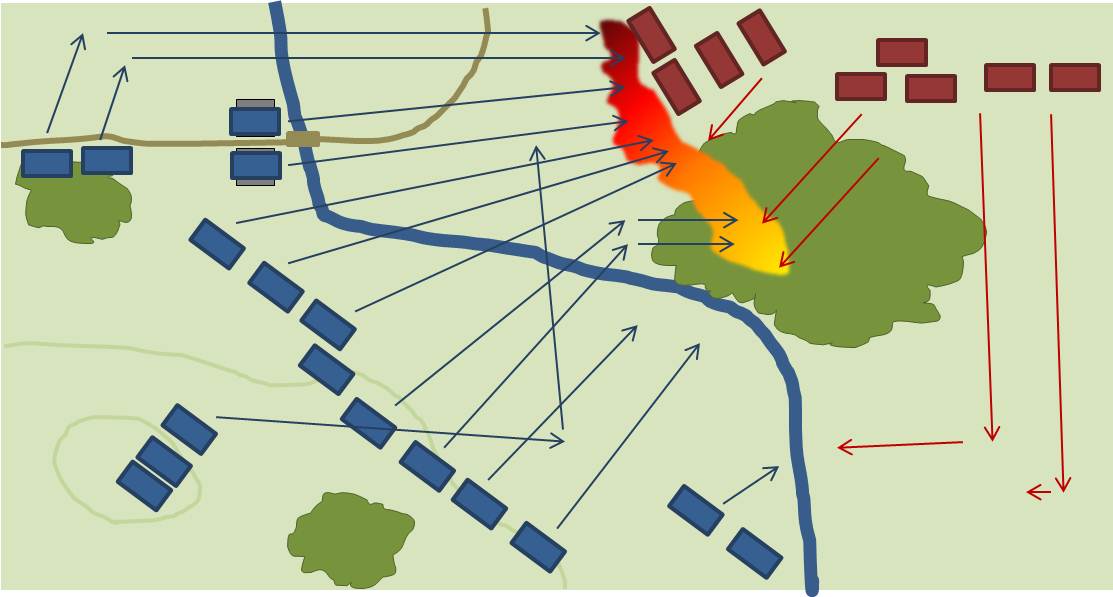
So the armies deployed for battle – the Austrians deployed
conservatively with a plan to take and hold the central heights while fighting
defensively on the flanks. The French deployed along 2/3 of the field in a
string defensive line guarded by artillery…but…with one strong-looking striking
force. The French commander deployed a division of Bavarians (4 infantry units
and 1 artillery unit), a division of French (3 infantry units) and a division
of Cavalry (4 cavalry units) along their far right flank in a position to smash
into the Austrian left. The Austrian left was held by the division I was
commanding (2 infantry units, 2 cavalry units and 1 artillery unit) and had
only open terrain to stand in. This flanking attack would turn out to be the
point of decision in the battle.
As the battle unfolded, Chris’ Hungarian division, with no
opposition before it swept forward and seized a small town to anchor it’s right
while facing left to pressure the end of the French defensive line. Near the
end of the game, the Hungarians began to dislodge the French line while losing
the town to some French troops arriving late onto the field.
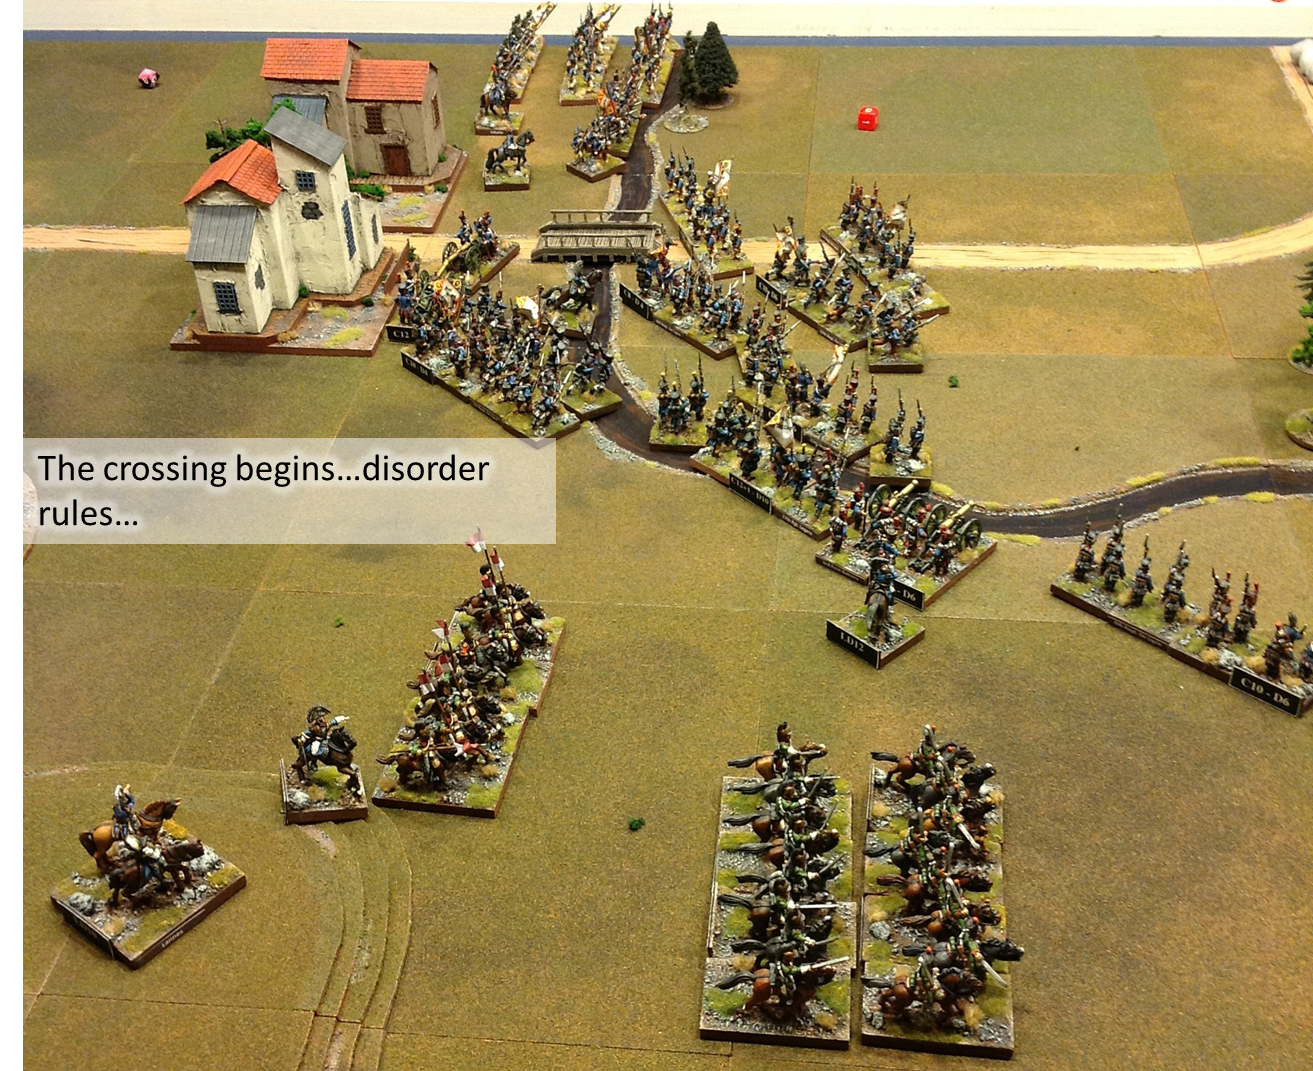
Because of the positioning of the French artillery, we
abandoned the desire to take the central heights. Instead, Greg used it to
screen the advance of an infantry division to support the Hungarians. This
division included our best troops – a unit of converged grenadiers.
Greg’s other division did not undertake much movement due to
a combination of circumstances. First of all, the aforementioned French
artillery dominated an expanse of open terrain eliminating the possibility of
any advance without undue losses. Secondly, the commanding officer of the
division was not well rated, resulting in some delay and inflexibility.
Thirdly, with a French/Bavarian force likely to crash down upon my division and
roll up the flank their positioning was good for support.
In fact, this division would lend valuable support to mine –
and – formed a small hedgehog of squares on a ridgeline when it looked as
though the French cavalry may be in a position to exploit matters.
As mentioned earlier, the big French force possibly
targeting my division was to be the point of decision. Indeed the French
players said that they moved ahead with the attack given that my small division
was outnumbered almost 2:1.
So, the attack commenced. The Bavarian infantry moved ahead
in lines, supported by Frenchmen on their left that moved through some very
dense woods (Class-III). The French cavalry followed closely behind the
Bavarians in attack columns.
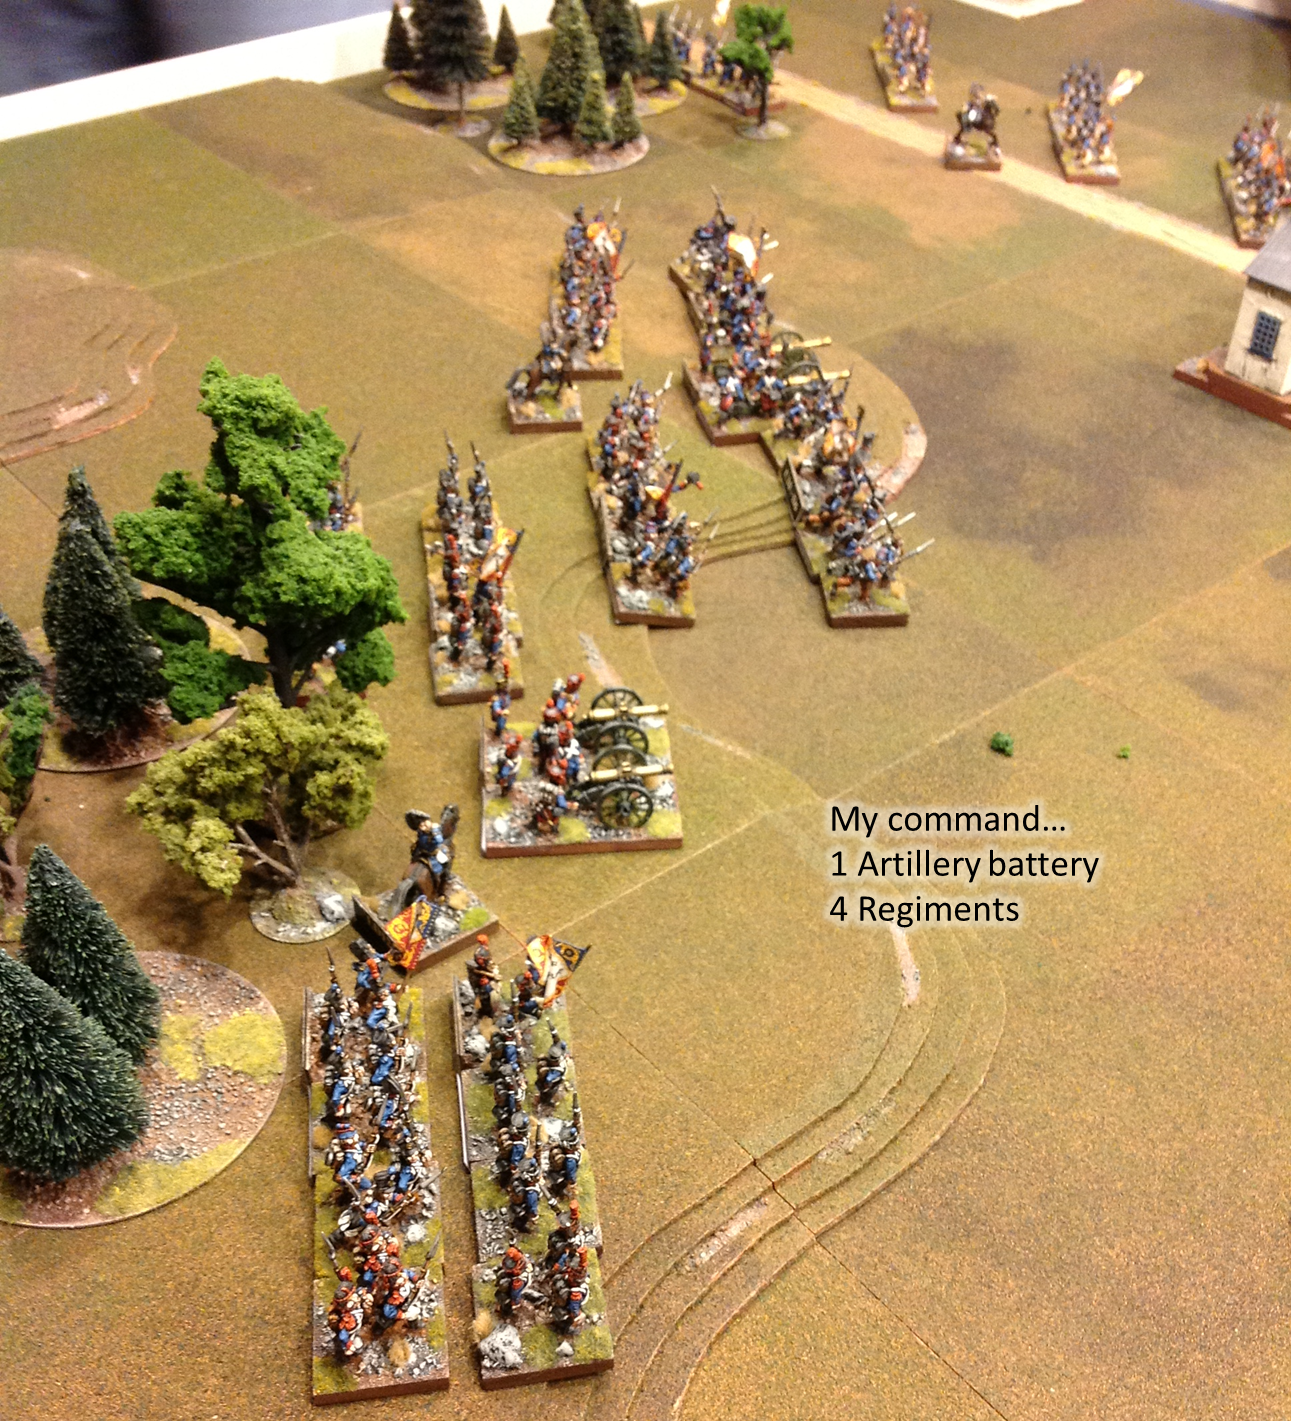
My plan to deal with the attack relied on two things: common
sense and fate. I determined to form a line with my two infantry units with the
artillery in the center of this line. I wanted to be sure that I remained out
of musket range of the woods – to deprive the enemy of this valuable cover. Behind
this line, I formed my cavalry (cuirassier and dragoons) into attack columns packed
in just behind my leftmost infantry unit. I hoped that I could do some damage
with musketry and cause some opportunities for my cavalry. I assumed that my division
would be wiped out and that my job was to drain energy from the enemy so that
Greg’s division could save the flank.
The Bavarian infantry rounded the woods and came under
artillery fire from my line. I was lucky enough to catch the Bavarian artillery
in limbered status and drove it from the field before it could see any action. It
then appeared that the French and Bavarian infantry wished to coordinate their attack
on my line, and that would be a wise decision, because the Bavarians halted and
did not advance further on two opportunities.
Once ready, the Bavarians advanced – pushed on by the French
commander – it turned out that they came on unsupported by the French infantry
anyway. The Bavarians – the worst rated division in the French army this
evening – fought well, earning the respect of their Germanic enemies, but were
ineffective. The field in this area became a swarm of furious melee actions. In
the end, one of my infantry units held its ground in spite of tough losses. The
other unit lost few men but did give a little ground. But the star of the
action was the artillery battery – it won two melees with infantry! As the
Bavarians fell back my line was hurting, but intact…but the Bavarians were
reduced by half with their remaining units battered severely. They played no
further role in the battle.
At this point, disorganized French infantry finally began to
pour out of the woods. My rightmost infantry unit fought hard but was forced to
fall back, exposing the brave artillery battery to a flank attack which
destroyed it. The French infantry also destroyed my leftmost infantry unit. My
cavalry struck back routing a French unit from the fight. Greg rushed in an
infantry unit to stem the French infantry advance and did indeed halt them. My
remaining infantry unit, still in good shape was allowed to fall back.
The French cavalry then showed up. My cavalry, outnumbered
2:1 and a little worn from action with the infantry stood little chance. My
dragoons sold their lives dearly and allowed the cuirassier to stop one thrust.
On the ridgeline behind the melees, we formed a couple units into square –
there was little to prevent the French cavalry from riding up at this point. My
division was reduced to one slightly worn infantry unit and one expended cuirassier
unit. The unit Greg sent in was also slightly worn.
At this point, the circumstances were present for the French
to seal the deal – but – they had run out of army morale points and lost the
battle. They had suffered too many losses in the battle. The Austrians had only
three morale points remaining.
It was a fun fight. I expected to be in a “quiet sector” of
the field and instead was the target of the attack! My division was almost
destroyed, but inflicted the same losses on two enemy divisions…and…my losses
would have been a little more severe without the timely support of Greg’s
division.
I look forward to the next fight. This time I do know what
the field looks like! The field is gonna be a tough fight. My army does have
shovels in the train, Greg hopes we never use them – but – since the enemy is
also reading this post, we’ll keep everyone in suspense!
 |
| Austrian and French movements in the battle... |
 |
| The next battlefield! |