


Allied
Foot Artillery: 4 elements (1 as Elite)
Light Cavalry: 3 elements
Muskets: 15 elements
Musket/Light Infantry: 3 elements
Heavy Cavalry: 3 elements (1 as Elite)
"Average" Sub-commanders: 3 elements
"Good" C-in-C: 1 element
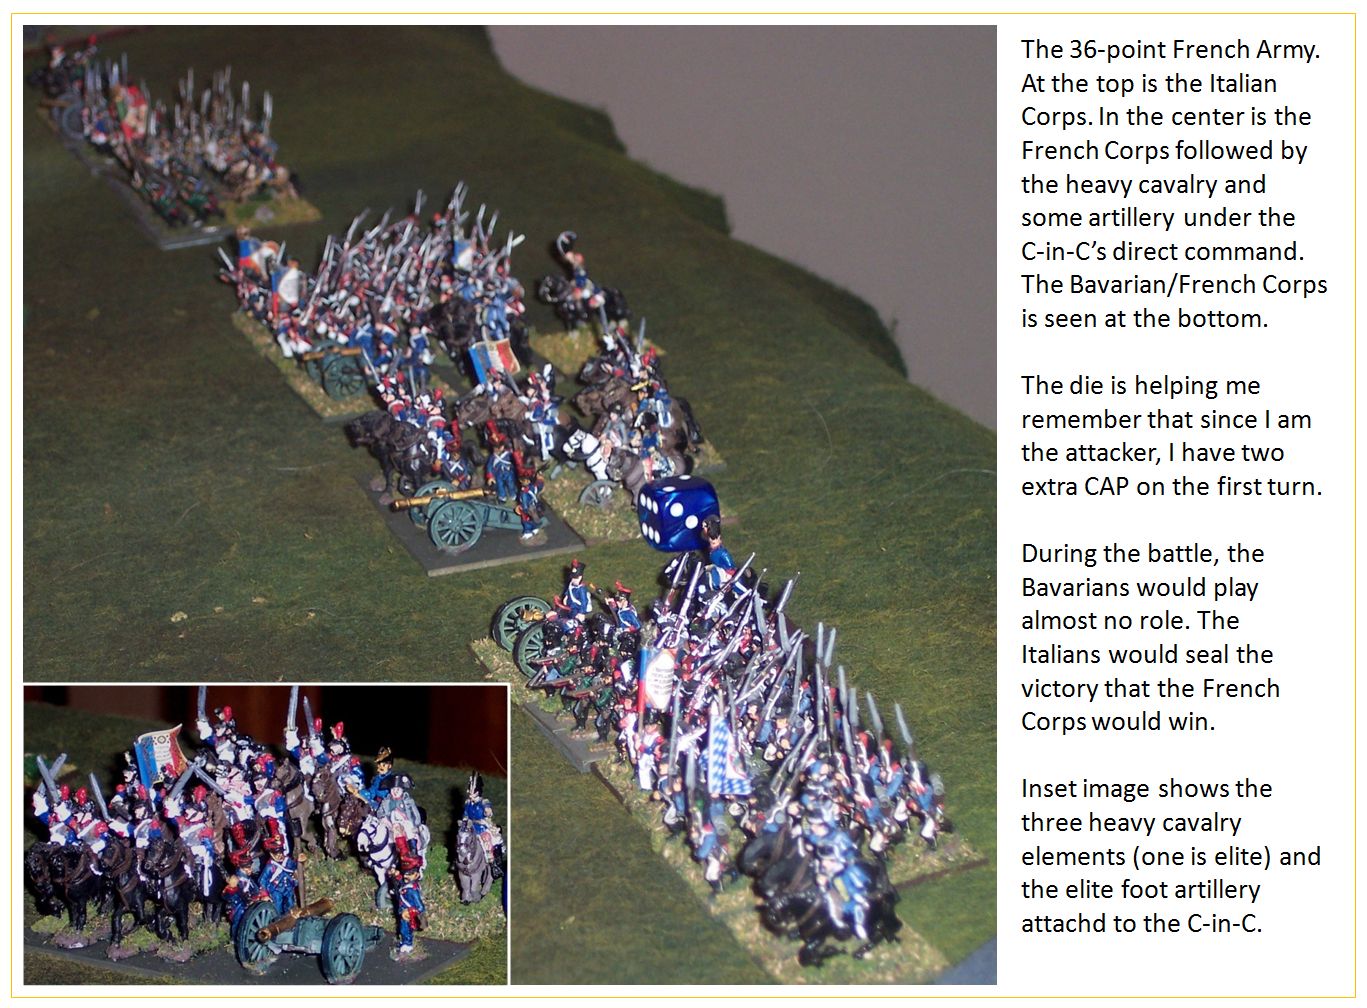
The French commander created three corps, each consisting of 1 artillery, 1 light horse, 1 light infantry and 5 musket elements. Under the direct command of the C-in-C was the elite artillery element and the three heavy cavalry elements. One corps was composed entirely of Italian troops, one of French troops and one mainly of Bavarians with a small French representation.
Austria
Foot Artillery: 5 elements
Light Cavalry: 5 elements
Muskets: 18 elements (2 as Elite and 6 as Militia)
Heavy Cavalry: 3 elements
"Average" Sub-commanders: 3 elements
"Good" C-in-C: 1 element
The Austrian commander created three corps. One corps consisted of all of the mounted elements. One corps consisted of all of the artillery elements and all of the militia musket elements. The third corps consisted of the remaining infantry. No elements were placed under the direct command of the C-in-C.
We set up a battlefield and rolled that the French would be the attacker. We then deployed our troops in the following manner - which we think is better than the prescribed method.
- Defender deploys 1/2 of his commands to the battlefield within 600 paces of his edge and no closer than 300 paces from a side edge. This number is rounded up if the C-in-C is "poor" and is rounded down if the C-in-C is "good". If the C-in-C is "average", then roll 1d6 to determine if it is rounded up or down. Defender then deploys any garrisons in BUAs (in addition to the commands already deployed).
- Attacker then deploys all of his commands to the battlefield within 600 paces of his edge and no closer than 300 paces from a side edge.
- Defender then deploys his remaining commands within 600 paces of his edge and no closer than 300 paces from a side edge.
- When a command loses 1/3 of its original element count (rounded up) it is demoralized.
- A demoralized command can only spend CAP to prevent fleeing and can no longer initiate close combat. Any element not help by CAP makes a flee movement each turn.
- A demoralized command cannot transfer out any elements to another command and cannot accept transferred elements from another command.
- Transferring elements into a command DOES NOT change the "original" number of elements in that command for purposes of determining demoralization. For example, if 1 have 9 elements and I transfer in 3 more, I still can only lose 3 elements before being considered demoralized.
- Transferring elements out of a command DOES change the "original" number of elements in that command for purposes of determining demoralization. For example,if I have 6 elements and I transfer out 3 elements, the "original" size of the command is now considered to be "3", not "6". Otherwise, I could get cheesy with the demoralization rules - and we don't want that.
Here are some pictures (click to enlarge)!


Beautiful Tony. Great battle report and the pictures were excellent. Can't wait to get back from this trip to throw down some battles. Dan
ReplyDeleteThank You and that i have a tremendous provide: What Was The First Home Renovation Show home renovation companies
ReplyDelete