Sunday, January 22, 2012

Field of Battle Napoleonics

Well, between work and being sick for a week, not much to post about lately. However, with a trip to Brent's house last evening that has changed. We played an excellent game of Napoleonics using Field of Battle 2.

There were six players. Myself, Greg C. and Greg R. on the French side and Terry, Chris and Ed on the British/Spanish/Portuguese side. Yes, this was a Peninsular War battle.

The forces in the battle were essentially even in size, the French had 1 more Army Morale Point and I think 1 more unit that the Allies. The French forces appeared to be of decent quality scanning the ratings. I really don't know much about the Allied quality except that the Spanish were not well rated. The Rifles and Highlanders were so I presume that the overall rating of the Allied force was respectable as well.

We began by using the Fate and Command rules to produce some variable conditions for the battle. From these, the French were able to gain some deployment advantages in terms of positioning on the field and a redeployment option of one command. Obviously, in terms of miniature history, Allied inactivity and French reconnaissance conspired to dictate these conditions. The only other condition to come from this was that the Spanish troops were delayed in arriving from the field. Perhaps due to incompetence in their command orders were not acted upon in a timely manner (in fact, the Spanish forces would never arrive at the battle).

So, after the deployments were completed, with a large French force aggressively deployed in the center of the table, supported by a grand battery - the Allied players seemed pessimistic about the pending course of the battle. Especially when reminded that a handful of Spanish units have not arrived at the field.

So, it was not with Allied enthusiasm did we begin the battle. However, the plans of generals are often dashed by events on the field - and this was to be the case with the French.

Battle Plans

Winning the initiative, the French began flipping cards. The first two cards were Leadership cards. Ouch. We're not going to be able to do much rallying of men in this first turn, we better make each action count! God forbid we should lose a commander to enemy action too!

Next card...Move. Excellent! Onto the attack! The center surged forward (except for one blundering command), the reserve for the center began to swing into position - aggressively advancing in march columns. The British and Portuguese began to shoot at the advancing French center, some losses were caused, but that is to be expected!

Next card...Army Morale. Ok, we've lost only a couple chips, no worries there. Let's check for commander risks. That's when it happened. The best French combat commander on the field, leading the largest infantry brigade in the main attack was killed! Crap! We have already burned 2 Leadership cards and have 95% of the deck still to go through!

Before the battle, the Allied commanders where thinking about how to write uplifting reports on a defeat of arms. Now their hearts were uplifted by the misfortunes befalling the French! Oh, and it is their turn now too!

Move One Command. The British flankers move out towards my columns of infantry moving to form the reserve of the center. Ok, cool, as long as they don't get another move card drawn. Next card? Yep. Movement.

The British crashed into my forces while still in column, easily routing them. Over the next few actions sequences, only one of my three regiments was able to put up any fight, but it was soon routed. Now, my aggressiveness (and excellent British leadership, Chris) has caused me to lose the reserve for the main fight...and the French center is exposed.

In my command were two French cavalry units marching with the center - hoping to be used as the mass of decision. I had to divert them towards the crumbling flank to try and stabilize it. I was able to do so over the course of several action sequences, but at the cost of good troops NOT advancing with the main force.

During this time, the center plowed ahead and was involved in a very difficult fight. Greg R. really did a good job. With his best commander killed and that command stalled and the loss of the supporting cavalry he still managed to advance and drive in the Portuguese. Harassed all the way by Ed's British that invested the town, there were many French losses. Morale chips flew away from both armies.

Near the end, we had 1 remaining morale point. We caused some losses on some British and drained their points, earning us 2 points in the process. Shortly thereafter, the British drew an Army Morale Card and with no points remaining lost the die roll and ended the battle.

What a great battle and a great gaming experience. Looking at the fight in the light of the next morning, I think that the British won that fight. Sure, they had to retreat from the field, but look at what was accomplished:

1. They were outnumbered since the Spanish did not arrive for the battle.
2. The French had a large and aggressive advanced deployment - with a grand battery - and a local advantage in numbers.
3. They fought the French to a complete standstill.

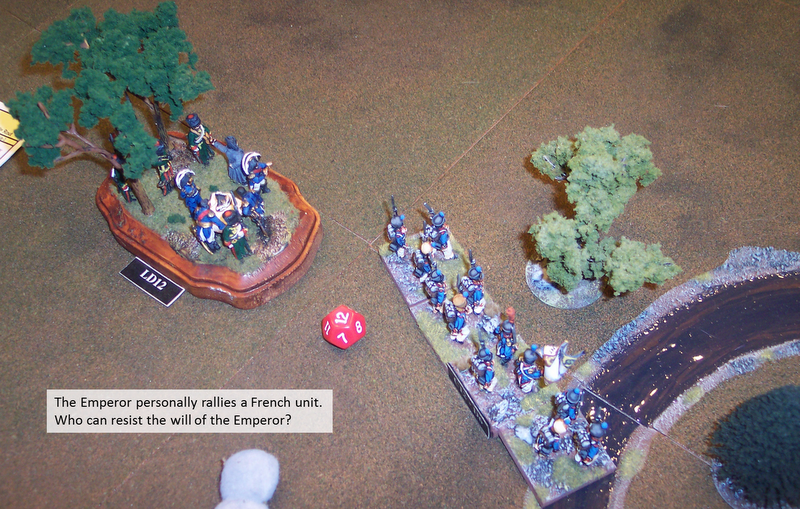
Good job guys...onto the pictures...


Sunday, January 1, 2012

SDS Scenario Idea

So, I was hanging out surfing various wargame blogs and I saw a post somewhere or another (actually, here) about an old bridge in England that had an awesome center building. And that sparked a fond memory of intense games of America's Army (a first-person shooter we used to play a lot of) on the "Bridge" map...

So, I began to think of a terrain board for Song of Drums and Shakos, set in Napoleonic Spain, of a bridge. The bridge would be the main focus of the board of course, and would be nice and wide and have a "castle" on the bridge too (like the one from the blog post I referenced).

But, the bridge would be set to the left of the center of the terrain board and allow me to build some town buildings and would create a firefight that takes place across the river. But, of course, we'd have to allow for a couple of small rowboats should one side or another wish to force a crossing on the water.

So, I sketched out the terrain board...

In order for a firefight to ensue with the SDS rules, the musket-shooters must be within about 22 inches, so from building to building going across the river is 20 inches. This makes the board itself only 24" deep. The board would be 36" wide.

This means that there are only 2" on either side of the board for the riverside buildings. OK, this presents a modelling opportunity - the backside of the buildings need not be modeled. They'll be open to allow players to place miniatures within them. This also means that I don't need to build removable roofs and detachable floors. See the lower left corner of the sketch for an example.

The height of the bridge means that I have two levels of terrain to work with...street level and water level. The water level has a stone "dock/walkway" along its entire course...with a post anchored semi-regularly to which to tie one's boat. This walkway would be about 2" wide on either side, leaving a 16" wide river. Access to the dock would be through stairways down from the street level and through the occasional doorway from the water-level buildings. The dock goes under the arches of the bridge too, providing some cover and access to the small portion of the board on the other side of the bridge.

The street-level buildings would be various constructions of the period, with windows overlooking the river. Perfect to shoot from onto the bridge or across the river at the enemy - be they in the houses or on the dock or rowing across the river boats.

The bridge would be 10" wide about 20" long, the last few inches on either side giving street-level access to the bridge. 2" wide stone pedestrian paths line each side of the bridgeway leaving a 6" wide stone wagon path down the center of the bridge.

The stone castle, in the exact center of the bridge, would stand three storeys high. The first level would be dominated by the main center archway and the two smaller pedestrian archways. Access to the second level would be by ladder - found in each of the two pedestrian archways.

The second and third levels would feature arrow-slits (presumably the bridge would have been built in medieval times) to fire through onto the decks of the bridge itself.

So, the question is, would this provide an interesting scenario? 

There would not be a lot of maneuvering, except for the race to get to the castle. That could be interesting given the unpredictable movement mechanism in the SDS rules. Better troops are more likely to get there before inferior troops, but there are no guarantees!

The fight for the bridge would involve some musketry until the sides closed in and then a lot of bayonet work. This would make for a lot of tension. A few barrels and hay wagons could be strewn about for cover at the ends of the bridge...maybe someone will get the wild idea of using the troops to push forward a hay wagon for cover on the advance!

The firefight across the river would probably be a little dull. Reload, shoot, repeat. But some interesting tactics could be used, like one solider shoots as another reloads then steps out of the way to reload while the other shoots.

To mitigate some lack of movement, one side could be given extra points and must make a push across the river in rowboats. This wold provide some tension as some troops stay behind to provide covering fire while others move onto the docks and row across to land on the opposing dock.

So...I don't know, something to think about. It looks fun to build...but why build it if the battle would suck. I'd appreciate any thoughts that readers may have. Leave a comment if you would please...

Friday, December 23, 2011

Merry Christmas

Merry Christmas fellow Military History Hobby Enthusiasts!

Today was the first day of 11 consecutive vacation/holiday days off from work. During these days, when I apply myself to this hobby, I have two focus points:

1. 15mm Vietnam Gaming. My friend Binhan wants to embark upon a Vietnam War campaign with several members of the local club. So, I need to get my troops in order and get more painted. Also, I may be shipping off a chunk of vehicles and helicopters to my brother - they're his - and those guys may get into some action too. Binhan's campaign is mainly about infantry, and I plenty of other vehicles, so no worries.

Part of the prep work is going to be re-basing the infantyr. I'll want to play with Brent's new "Follow Me!" rules when they are available.

2. Objective-C Education for iPad programming. I write software for a living, and I enjoy using my iPad (when I can wrestle it away from my wife!)...so why not learn to write apps? I already started my learning and wrote my first "hello world" iPad app. Yes, I do have a wargaming-related project in mind. Nothing fancy, but something I think could be useful.


So, a Vietnam themed image to leave you all with...


Saturday, December 17, 2011

Field of Battle - ACW, again!

Last night I hosted another Field of Battle (2nd Edition) ACW scrum at the club's Friday Night Fights.

We drew 10 players...wow! Dan was going to play SDS but had to cancel due to life's often unexpected intrusions. I know that one, maybe two, of our players came to play that instead, but ended up playing ACW with us.

Two of our players planned to play a medieval wargame but canceled that as no one else had indicated a desire to play during the week. That's not a reflection of the guys or the game they intended to play, rather a reflection on people not communicating desires. For my game, only Scott and Colin had earlier indicated a desire to play. So, I expected that only the three of us would for sure be playing...maybe a pick up player or two.


The result? Running the only game of the evening and having the game be one with a very fun set of rules. 10 players, 1 referee, lots of chaos, but lots of fun. Several of the players have done so before, so I did not need to worry about every detail - thank guys, you know who you are!

The highlight of the battle was Colin's Union command. This was his first game of Field of Battle and his last game at the club for a while (his family is moving to Texas). He drove his men into Doug's command and got the upper hand. Doug, wisely, fell back towards the support of his friends. You could still see the fight in Doug as he fell back - he did a charge and wanted to do some other things, but his generalship won out over his bloodlust. In the end Colin's command, along with men from Rick's and Reto's fought right up to the new rebel lines. Good stuff fellas!

I did manage a few pics, but was very busy for the evening...


Sunday, December 11, 2011

SDS Multiple Battles

Wow. What a day! The Broncos pull out another one...and...Dan and I hosted a triple Songs of Drums and Shakos (SDS) battle!

That's right, we put on three simultaneous SDS battles today at the club meeting. There were 16 people playing, helping or both on the three battlefields - what a turn out! The rules produce fun skirmish results and the guys have taken to them. As Dan has mentioned, members are producing squads of French and British "out of the woodwork"!

The battle I was most familiar with today involved some British lights and Royal Marines landing to surprise some Frenchmen guarding a payroll wagon in a sleepy seaside Spanish hamlet. There was a small French warship docked at the hamlet too...garrisoned by some French sailors...strung out a little loading supplies onto the ship from the dock. When the battle started, the French were rushing troops into the hamlet to oppose the English landings.

I ran the French sailors and my seamen, after trying to establish some semblance of order in their ranks, were quickly engaged by some Royal Marines. I actually did a pretty good job of holding them up for a few turns, but was outclassed by them and was ultimately defeated. The remaining sailors retreated to the ship to await terms (sailing out would mean doom with English warships in the harbor).

Funny thing. Dave had painted up the two units of Royal Marines, augmented with a couple of sailors, and was anxious to use them on the tabletop. But, the two kids with us that day, Colin and Ben, really took a liking to them (who could blame them?) ans asked Dave if they could play them! Dave, being the gentleman gamer that he is, obliged the kids and took command of some French infantry.

Speaking of Dave's French command, they advanced quickly to the edge of some light woods and began a fire fight with Ben's marines. Even though the sides exchanged some casualties, the marines had a stone wall to hide behind! So Dave fell back to draw the marines in.

Meanwhile, Greg's British lights infiltrated around and engaged Matt's French infantrymen in a fierce fight - Greg's sapper was an early casualty. Matt and Greg slugged it out, pretty much to a draw until Colin's marines finished me off and added their weight against Matt.

Ben's marines, now moved into the hamlet when Dave fell back...causing Dave to again attack him - the two fighting with and around a building. With Dave occupied by Ben and Matt falling back and continuing to fight Greg, Colin advanced his marines up the roadway and captured the payroll chest - ending the game in a British victory!

Good stuff gentlemen!

Pics follow...

Two battlefields on one table

Action is about to commence

Dan giving instructions

Stan and Scott guiding the players in the game

Eric awaits events

Sailors versus Marines

The Spanish Church again in contest

Rifles versus Dragoons

Action in the church

John's highlanders advance towards their fates

The sailors stand firmly...for now

Lights and Frenchmen

Dragoons in the open, Rifles behind a wall...hmmm

The hallway was violently contested

The church grounds

Dave's command advances towards a building

Marines are looking good

Marines rule the roadway

In-house action