


After a few previous playtest games, Brent had made some changes,
additions, deletions and tweaks, so it was time to run through the rules
again. So, last weekend, we gamed two more playtests of the PoB rules.
Both fights involved the usual cast of characters and armies - Romans
and Macendonians.
We hoped to be able to get in two games. Game one would be a straight "no terrain" battle so that we could test rules features without terrain being a factor. Obviously, terrain is a factor, so we wanted to do a second game with a little terrain. Matt and I had done two previous playtests with the Chinese using lots of terrain, we had no big issues, just some suggestions.
I have played in 4 battles now with Romans and Macedonians and 2 battles with Three Kingdoms Chinese. Considering that some 500 years separated those two periods, they were both handled well. In my opinion, the rules are coming along nicely. I have seen maturation of concepts while remaining faithful to core Piquet concepts. Fans of classic Piquet and Field of Battle will find familiar mechanisms but with several new twists here and there.
I personally think that the interactions of the different troop types and weapon interactions is looking really good. I do get the feeling that my decisions matter with regard to the right guys at the right place at the right time. Of course, what Piquet excels at is wonderfully interfering with my attempts to get the right guys at the right place at the right time!
The games did not drone on. Both games were completed promptly with a clear decision on victory and defeat! We did not use particularly large forces, so that is a contributing factor in keeping the games short. But we used large enough forces to have an enjoyable battle (about 15 units per side). We use larger armies when we play horse and musket games (25+ units per side) and those games do obviously take longer to conclude.
Here are the two battle reports, with pictures. The second battle report follows the pictures of the first, this is a long post, so scroll down...
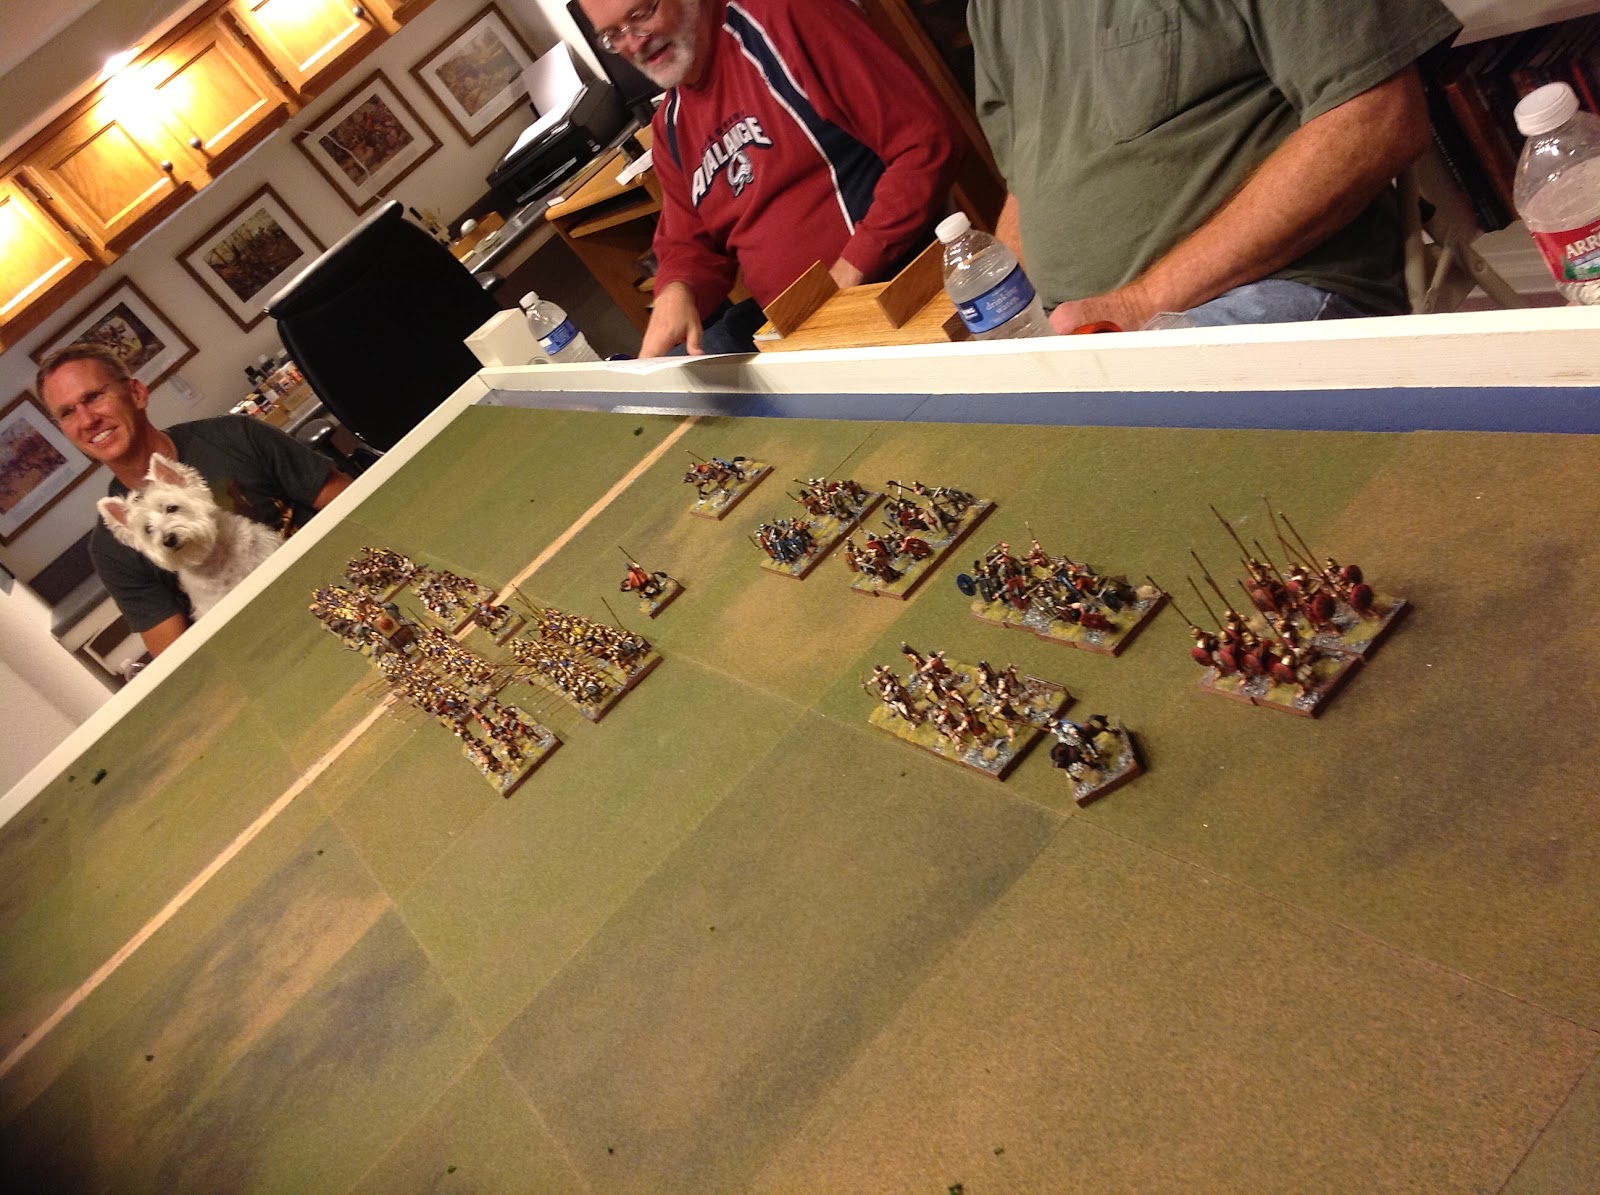
Battle One - The Golf Course
Using zero terrain, we deployed the armies using Brent's experimental new system. This system has charm due to its simplicity and speed. If you are fighting a pick up battle and you need to deploy forces on the fly, this gets the troops on the table and into action pretty quickly. It is done with a standard deck of cards. Your hand is randomly drawn but weighted by the quality of your overall command - so, if your command quality is better than the opponent's then you probably have a more advantageous hand to play at deployment time. But, you never know, the Gods of War are fickle at times! Playing the cards determines deployment and change sequences - soon, the lead legions are ready to move out. Also, light types have some advantages in being able to be deployed further forward if desired.
We Romans, in this battle, planned to try to avoid contact with the Macedonian phalanx, focusing on the supporting wings of the enemy army. To that end, we deployed with a large gap between our center and our right. Our left was a completely inadequate force of light and medium horsemen of one of our allied countries. The enemy's left was a force of allied barbarians stiffened with one pike formation. Their right was a powerful force of horsemen. The Macedonian center was the phalanx with the elephants bracing the right extent of that line.
Not being Macedonian, I have no idea what their plan was. The Roman plan was to smash the barbarians on our right and flip into the flanks of the phalanx. On our left our only plan was to try to occupy the enemy horse with ours for as long as possible before being crushed under their weight. If the enemy horse got on the left flank of our center, all would be lost. Our center was to split in two! One part to advance on the elephants and cause the phalanx to either advance forward or hold position without getting pummeled by the phalanx. The other to shift right and pin the enemy phalanx for the flank blow.
That is pretty much how the battle went too. Our horsemen were expended but did not allow the enemy to fight our center - Greg felt a little like Custer with his assignment. The center split and the left portion was able to engage the elephants and to avoid contact with that extent of the enemy phalanx. The right portion of center faded further right and engaged to pin down that extent of the enemy phalanx. The Roman right was able to battle through the barbarians and get the heavy foot onto the flank of the phalanx.
The losses to the barbarians and to the phalanx drained the enemy morale points and the game ended in a Roman victory. It was fairly close though, we lost a bunch of points losing our mounted force and in the bloody fight with the barbarians! Good job to all!
Brent recorded on his blog that the battle was about 2 hours. Honestly, I cannot recall if that included deployment time or not. Nevertheless, impressive!


Battle Two - The Big Hill
For this battle, we re-rated the armies to mix it up and laid down a large hill on the table. There were a couple wooded areas on the flanks of the table also. Used the same deployment method as in game one.
I was again Roman in this game, so I cannot record the enemy plan. From the deployment of the enemy, we can deduce that the phalanx would advance to their right of the hill to grind up the Romans while the mounted troops would dominate the hill. That deployment, if it developed as we thought, would leave their left completely open. So, we deployed our horsemen, "stiffened" with one unit of light foot on our right to either swing 'round and raise havoc in the enemy rear or to divert the enemy horse a little to our right. Our footmen deployed en masse to face the enemy phalanx, elephants and horse.
As the battle developed, the Macedonian horse did indeed advance strongly and occupied the hilltop. To their right, the phalanx did not advance - even to use the hill to protect the flank, so their flank was indeed wide open. Now, that open flank was some 50 or 60 inches away from our horsemen - so, it was sorta safe...for now.
The Roman foot tasked with engaging the enemy horse marched up that hill bravely and soon was entangled with the horse and elephants. Those forces fought really toughly for many, many, many card draws - sharing in both success and failure. Terry and Greg really both fought their forces well here! This engagement did allow for the horse of our force to get moving on that flank move. Our light horse actually made it all the way to that exposed flank of the phalanx!
As the battle on the hill ground on, and the light horse was making its way throught the enemy rear, our left flank was slowly advancing towards the enemy phalanx, screening the movement with light footmen. The enemy phalanx stayed frozen in place.
Eventually, our light horse impacted the phalanx on its flank and begin to drive the footmen away! In the end we tied up a large body of enemy pikemen with a small body of horse, disrupting two-thirds of the enemy formation. However, the Macedonian horse got the upper hand on the hilltop and fractured the Roman force opposing it. Not only did this expose our left to being run down, it drained us of morale points - and the game soon ended in a Macedonian victory! Another well played game!
Brent recorded on his blog that the battle was about 1.5 hours. Again, I cannot recall if that included deployment time or not. But again, an impressive showing of time!


No comments:
Post a Comment